

Look, I’m going to be straight with you.
When Tuesday night rolls around and everyone’s hungry, cranky, and asking “what’s for dinner?” this skillet has literally saved me more times than I can count.
It started as a random Tuesday experiment. I had taco seasoning in the pantry and orzo that needed using. I threw them together thinking, “eh, worth a shot.”
That was three years ago.
Now? My kids ask for this at least twice a month. Sometimes three times if I’m being honest.

The whole thing happens in one pan. Which means I’m not standing at the sink for 20 minutes afterward scrubbing multiple pots and pans.
And that right there? That’s the real win.
I’ve messed with this recipe countless times. Added this. Removed that. Tried different seasonings. What you’re getting here is the final version—the one that actually works every single time.
Why This Actually Works (And Why You’ll Make It Again)
It takes 25 minutes.
That’s it. From pulling ingredients out of the fridge to sitting down with a full plate. No fancy knife skills needed. No complicated steps. Just basic cooking that literally anyone can do.
One pan. Seriously, just one.
The orzo cooks right in the seasoned broth. So it soaks up all those taco flavors as it gets tender. You’re not boiling pasta separately then mixing it with sauce later.
Everything builds together.
Your picky eater will actually eat it.
My youngest wouldn’t touch vegetables if her life depended on it. But this? She’ll eat a full bowl. The familiar taco taste plus creamy cheese wins every time.
Leftovers taste incredible.
Sometimes better than the first night, which seems weird but it’s true. The flavors meld overnight. You wake up the next day with an amazing lunch already waiting.
You can make it yours.
Want it simple? Just add cheese and call it done.
Want the full experience? Pile on lettuce, tomatoes, avocado, sour cream, lime juice—whatever makes you happy.
Both ways work perfectly.
What Makes This Different From Other Recipes
Most taco pasta recipes tell you to:
- Cook your pasta in one pot
- Brown meat in another pan
- Mix everything together at the end
That’s three steps and multiple dishes.
Why?
This method does everything in sequence. Same pan. No transferring. No extra dishes.
The orzo absorbs the broth as it cooks. Every single grain gets infused with flavor. You’re building taste from the ground up, not just tossing cooked pasta with sauce.
I’ve tried this with both ground turkey and ground beef. Both are fantastic.
Turkey makes it lighter. Beef brings that classic, rich taco flavor.
Use whatever’s in your fridge.
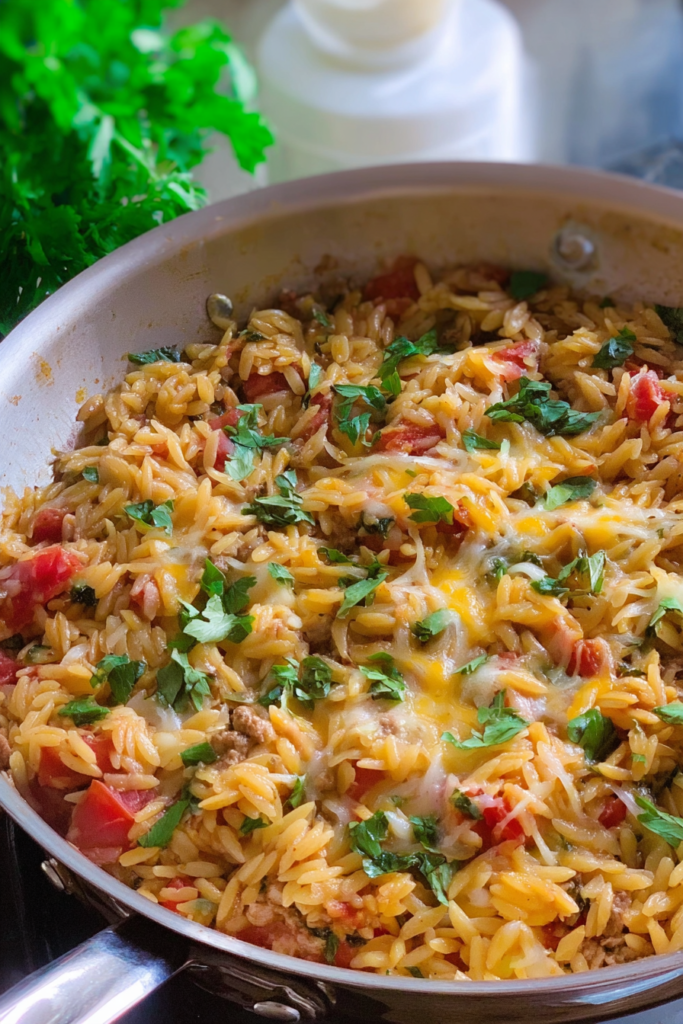
When you stir in the cheese at the end, it melts into these gorgeous strings of gooey goodness. It’s somewhere between a proper pasta dish and total comfort food indulgence.
Then you add the cold, crisp toppings.
Crunchy lettuce. Juicy tomatoes. Creamy avocado.
Each bite gives you different textures and temperatures. Warm and creamy meets cool and fresh.
This is my go-to when I’m exhausted but still want real food. It’s what I make when friends text “can we stop by?” with zero notice. It’s the dinner my family actually gets excited about.
Let me show you exactly how to make it.
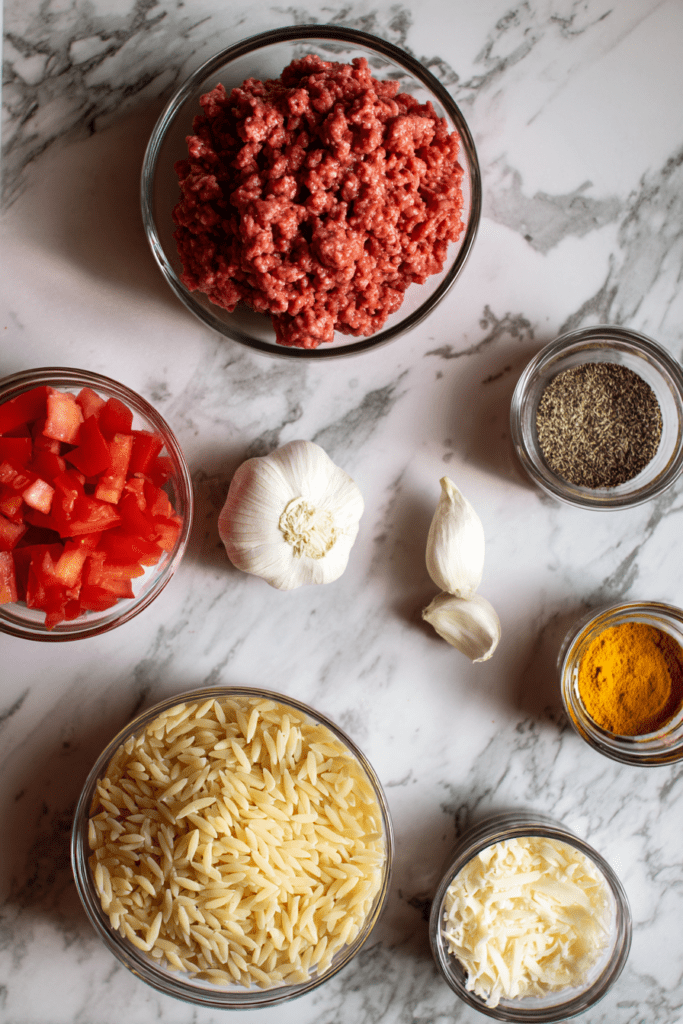
Ingredients
| Ingredient | Quantity | Notes |
|---|---|---|
| Ground beef or turkey | 1 lb | Extra lean recommended to minimize draining |
| Minced garlic | 1 tbsp | Fresh garlic provides best flavor |
| Salt | ½ tsp | Adjust to taste preference |
| Black pepper | ½ tsp | Freshly ground preferred |
| Smoked paprika | ½ tsp | Adds depth and subtle smokiness |
| Taco seasoning | 2 tbsp | See DIY blend alternative below |
| Diced tomatoes | 14.5 oz can | Fire-roasted variety adds extra flavor |
| Chicken broth | 2-3 cups | Low-sodium allows better seasoning control |
| Uncooked orzo | 2 cups | Rice-shaped pasta that cooks quickly |
| Shredded cheese | 1 cup | Cheddar, Mexican blend, or Monterey Jack |
Don’t have taco seasoning?
No problem. Mix these together:
- ½ tbsp cumin
- 1 tsp chili powder
- 1 tsp oregano
- 1 tsp garlic powder
- ½ tsp onion powder
Works just as well as the store-bought stuff.
Optional Fresh Toppings
- Shredded lettuce or baby spinach
- Diced fresh tomatoes
- Diced red onion
- Sliced avocado
- Sour cream
- Fresh lime juice
Prep Time: 10 minutes | Cook Time: 15 minutes | Total Time: 25 minutes
Servings: 6 | Difficulty: Easy
How to Make It (Step by Step)
Step 1: Brown Your Protein
Grab your biggest skillet. Put it over medium-high heat.
Add your ground beef or turkey. Break it apart with a wooden spoon as it cooks.
You want it completely brown. No pink spots anywhere.
This usually takes 6-7 minutes.
If you’re using regular ground beef (not the extra lean stuff), you’ll need to drain the fat now. Tilt the pan and spoon it out. Or carefully pour it into an old can.
Step 2: Build Your Flavor Base
Turn the heat down a notch.
Toss in your garlic right on top of the browned meat. Add the salt, pepper, smoked paprika, and taco seasoning.
Stir everything together.
Cook for about 90 seconds.
You’ll smell the spices bloom—that’s when they release their oils and get really fragrant. Don’t go longer than 2 minutes or the garlic might burn.
Step 3: Add Tomatoes and Liquid
Pour in the entire can of diced tomatoes. Juice and all.
Add 2 cups of chicken broth.
Dump in the uncooked orzo.
Now stir. Really stir. Make sure every grain of orzo gets covered by the liquid.
This matters for even cooking.
Step 4: Bring to a Boil
Crank the heat back up.
Bring everything to a rolling boil. You’ll see bubbles breaking across the whole surface.
This jumpstarts the orzo cooking process.

Step 5: Simmer Until Tender
Once it’s boiling, turn the heat down to medium-low.
Put a lid on the skillet.
Let it simmer for 12-15 minutes.
Set a timer.
Stir it 2-3 times while it’s cooking. Each time you stir, scrape the bottom of the pan. Orzo loves to stick.
Here’s the critical part:
Watch your liquid level. If the orzo starts sticking when you stir, add another ½ cup of broth.
The mixture should stay a little saucy. Not dry.
Different brands of orzo absorb liquid at different rates. So keep extra broth nearby just in case.
Step 6: Finish with Cheese
When the orzo is tender and most of the liquid is absorbed, turn off the heat.
Sprinkle the shredded cheese over the top.
Stir it through the hot pasta.
The heat from the orzo melts the cheese perfectly. No need to turn the burner back on.
Step 7: Add Your Favorite Toppings
This is where you make it yours.
I always add crisp lettuce and fresh tomatoes right before serving. The cool, crunchy vegetables against the warm, creamy orzo? Chef’s kiss.
Squeeze fresh lime juice over everything. It brightens the whole dish.
Add sour cream if you want richness. Scatter red onion for bite. Pile on avocado for creaminess.
Serve it immediately while the cheese is still melty and stringy.
Each bowl should be a complete experience.
Tips That Actually Matter
Check the orzo at 12 minutes.
This pasta goes from perfect to mushy fast. Taste a few grains at the 12-minute mark. They should be tender but still have a tiny bit of firmness.
Don’t skip the stirring.
I know it’s tempting to just let it simmer and walk away. Don’t do it.
Those 2-3 stirs prevent burning and keep everything cooking evenly. Orzo settles and sticks like crazy to the pan bottom.
Taste before you serve.
The cheese adds saltiness. So I always wait until after adding it to check if I need more salt.
Start with less. You can always add more.
Keep extra broth handy.
Have an additional cup sitting nearby while you cook. If things look dry before the orzo is done, you’ll be ready to add more.
Storage and Reheating
Leftover Storage
Let it cool completely. Transfer to an airtight container.
It’ll keep for 4 days in your fridge.
Honestly? The flavors deepen overnight. Sometimes day two tastes even better than day one.
How to Reheat
Add a splash of broth or water before reheating. The orzo absorbs liquid as it sits, so it needs that moisture back.
Microwave in 1-minute bursts. Stir between each one. Keep going until it’s hot all the way through.
Or reheat it in a skillet over medium-low heat. Add a bit of liquid and stir occasionally.
Meal Prep Tip
Divide leftovers into individual containers. Makes grabbing lunch for work ridiculously easy.
Ways to Change It Up
Want to mix things up? Here are some variations I’ve tried:
Swap the ground beef for ground chicken. Or use plant-based crumbles if that’s your thing.
Add diced bell peppers with the tomatoes. Extra vegetables never hurt.
Stir in black beans during the last 5 minutes of cooking. More protein and fiber.
Use Greek yogurt instead of sour cream as a topping. Gives you a protein boost.
Your Questions Answered
Can I make this ahead of time?
You can. But it tastes best fresh.
If you do make it ahead, cook it completely and let it cool. Store in the fridge.
When you reheat, add extra broth. The orzo keeps absorbing liquid even when it’s cold. Without that extra moisture, it’ll be dry and clumpy.
I don’t have orzo. What can I use instead?
Any small pasta shape works. Try ditalini, small shells, or elbow macaroni.
Check the package for cooking times. You might need a bit more or less liquid depending on what pasta you use.
Is this spicy?
Nope. Not really.
The taco seasoning gives it flavor without heat. It’s pretty mild as written.
Want more kick? Add diced jalapeños with the tomatoes. Or top it with spicy salsa.
Got kids who can’t handle any heat? The recipe as-is should work fine.
Can I double this?
Absolutely.
Use your biggest skillet. Or grab a Dutch oven.
The cooking time stays the same. But you’ll need to stir more often to make sure everything cooks evenly.
Why is my orzo sticky and clumpy?
Two reasons usually:
Not enough liquid. Or not enough stirring.
Make sure you start with plenty of broth. Add more if it looks dry.
Stir thoroughly each time. This separates the grains and prevents clumping.
What cheese works best?
Sharp cheddar melts beautifully. Strong flavor too.
Mexican cheese blends give you variety—different textures and tastes all melted together.
Monterey Jack is mild and super creamy.
Here’s a pro tip: Shred your own cheese if you can. Pre-shredded cheese has anti-caking powder on it. That stuff prevents smooth melting.
Freshly shredded always melts better.
Final Thoughts
Listen.
You don’t need fancy techniques to make good weeknight dinners. You don’t need a mile-long ingredient list.
You just need one pan, 25 minutes, and ingredients you probably already have.
This One Pot Cheesy Taco Orzo Skillet proves it.
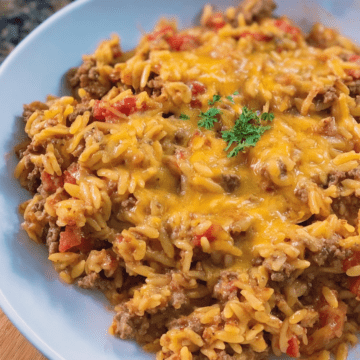
Seasoned meat. Tender orzo. Melted cheese. Fresh, crunchy toppings.
That’s comfort food done right.
My family asks for this constantly. Your family probably will too.
Make it tonight. You’ll see why this recipe earned its permanent spot in my dinner rotation.
One Pot Cheesy Taco Orzo Skillet
Ingredients
Main Ingredients
- 1 lb ground beef or ground turkey extra lean recommended
- 1 tbsp minced garlic fresh
- 1/2 tsp salt adjust to taste
- 1/2 tsp black pepper
- 1/2 tsp smoked paprika
- 2 tbsp taco seasoning
- 14.5 oz diced tomatoes fire-roasted if available
- 2-3 cups chicken broth low sodium
- 2 cups uncooked orzo
- 1 cup shredded cheese cheddar, Mexican blend, or Monterey Jack
Optional Toppings
- shredded lettuce or baby spinach
- diced fresh tomatoes
- sliced avocado
- sour cream
- fresh lime juice
Instructions
- Heat a large skillet over medium-high heat and brown the ground beef or turkey, breaking it apart, until fully cooked.
- If needed, drain excess fat. Reduce heat slightly and add garlic, salt, pepper, smoked paprika, and taco seasoning. Cook for 1–2 minutes until fragrant.
- Add diced tomatoes with juices, 2 cups chicken broth, and uncooked orzo. Stir well to combine.
- Bring to a rolling boil, then reduce heat to medium-low, cover, and simmer for 12–15 minutes, stirring occasionally.
- If the mixture looks dry before the orzo is tender, add additional broth as needed.
- Once orzo is tender, remove from heat and stir in shredded cheese until melted.
- Serve immediately and top with desired fresh toppings.