
Remember those Saturday mornings at the corner store?
I do.
Every weekend, without fail, I’d walk into that little shop and head straight for the snack aisle. Past the chips. Past the candy bars. Right to those golden-wrapped honey buns sitting on the shelf.
You know the ones I’m talking about. Sweet. Sticky. With that perfect spiral of cinnamon sugar running through the middle. They became my thing—my childhood comfort food.
Fast forward to today, and I’ve figured out how to turn that nostalgic snack into something even better. A full-sized cake that brings back all those memories with every single bite.
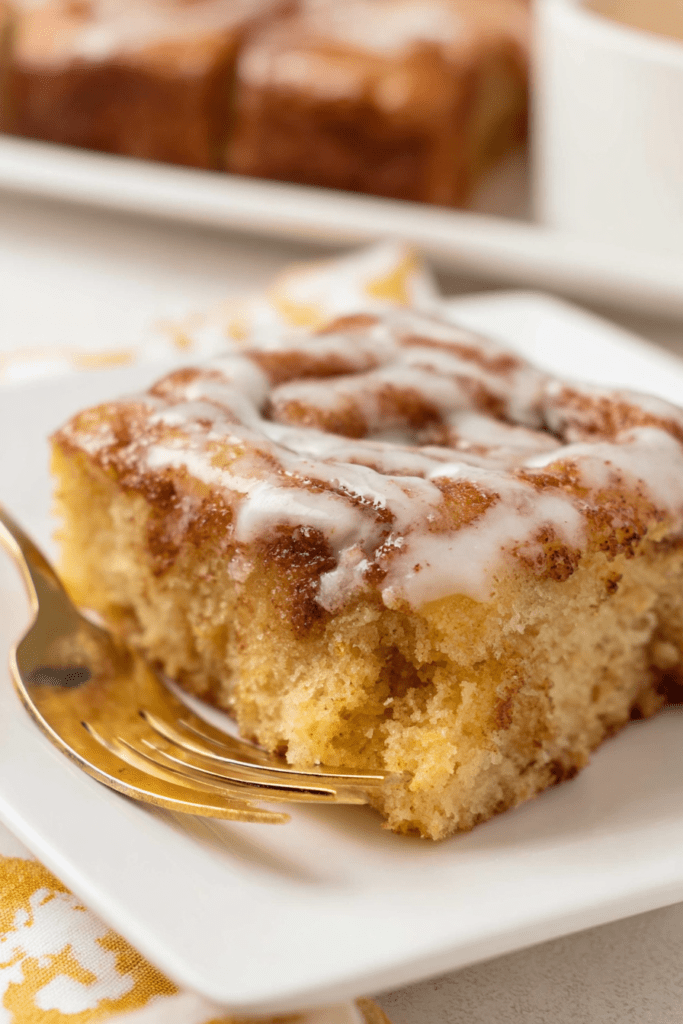
This honey bun cake? It’s become the dessert I make when I need something that feels like a warm hug. Simple to throw together. Impressive enough to serve at any gathering. And honestly? It disappears faster than I can cut it into squares.
The secret is pretty straightforward. You take a box of yellow cake mix and give it a serious upgrade with sour cream. That one addition changes everything. The cake turns out so tender and buttery, it practically melts the second it hits your tongue.
But here’s where things get interesting.
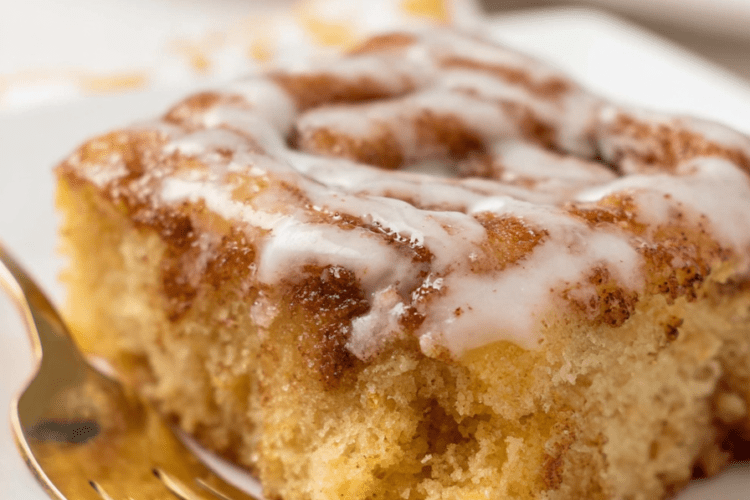
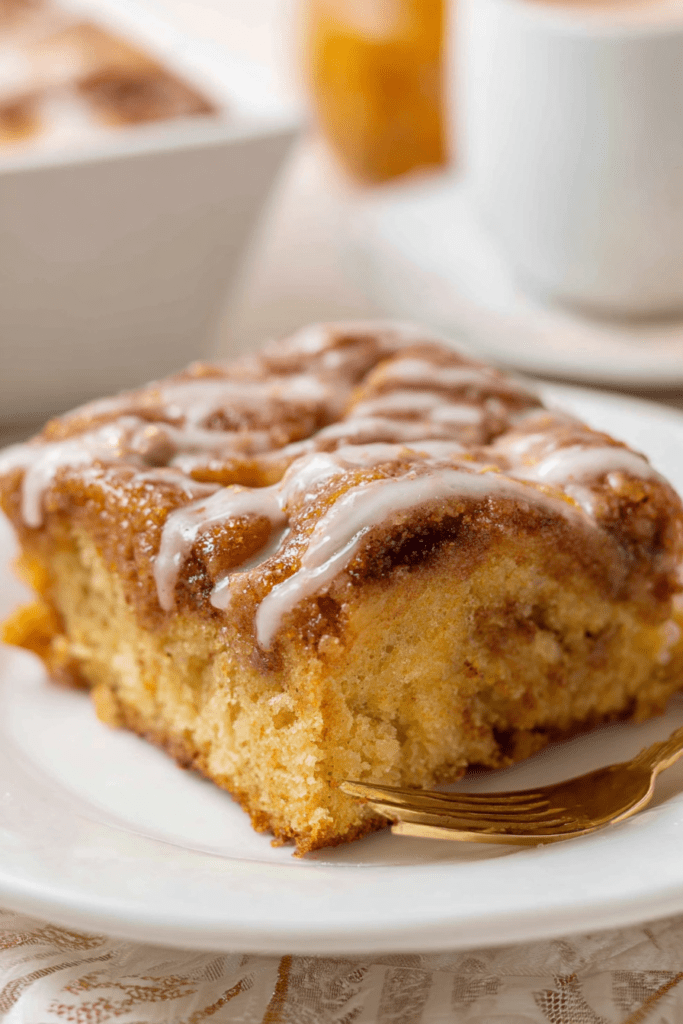
Between those cake layers sits a ribbon of cinnamon-spiced brown sugar. When you bake it, this mixture transforms. It becomes these gooey pockets of sweetness that taste exactly like the center of the best cinnamon roll you’ve ever eaten.
Then comes my favorite part—the glaze.
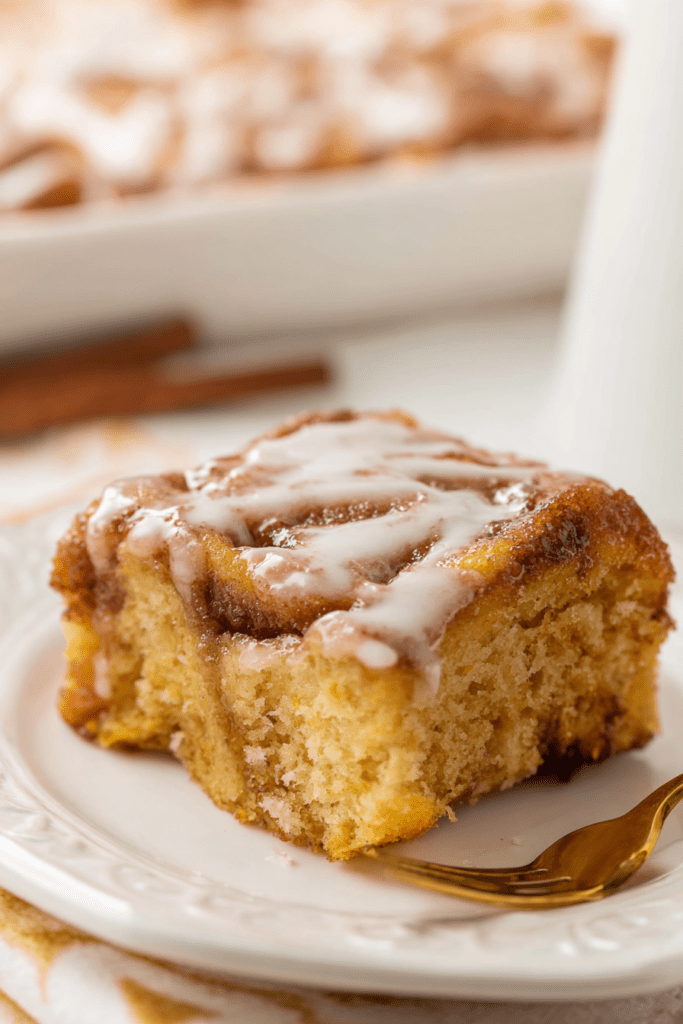
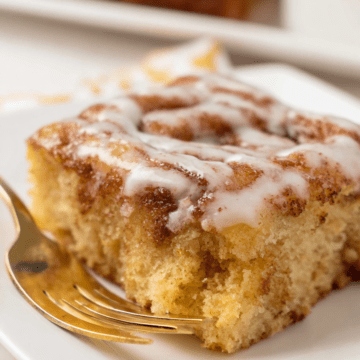
Just powdered sugar, milk, and vanilla. That’s it. But when you pour it over the warm cake, it sets into that signature honey bun coating. You know the one—that slightly crackly glaze that’s both soft and crispy at the same time.
I’m not exaggerating when I say this cake never lasts more than two days in my house. My family attacks it. The combo of soft cake, sweet cinnamon ribbons, and that crackly glaze creates something you just can’t stop eating.
Perfect for:
- Weekend brunch with family
- Church potlucks (trust me, you’ll get recipe requests)
- Office parties where you want to be the hero
- Tuesday afternoon when you need cake with your coffee
The best part?
You don’t need to be a baking expert. Seriously. If you can mix ingredients in a bowl and spread batter in a pan, you’re golden. Yeah, the batter comes out thick—really thick. First time I made it, I thought I’d messed something up. But that’s exactly how it should be. That thickness comes from the sour cream, and it’s what gives the cake its incredible texture.
Quick Stats
Prep Time: 15 minutes
Cook Time: 30-35 minutes
Total Time: 45-50 minutes
Servings: 24 squares
Difficulty: Easy (like, really easy)
Why This Recipe Works
Traditional cakes can be fussy. Creaming butter and sugar for 10 minutes. Separating eggs. Folding ingredients carefully so you don’t deflate the batter.
None of that here.
Everything goes into one bowl. Mix it up. Pour it in the pan. Done.
The cake mix gives you structure. The extras—sour cream, oil, eggs—bring all the moisture and richness. And that cinnamon swirl? Three ingredients stirred together in literally 30 seconds.
Now, let’s talk about that glaze for a second.
It’s not just there to look pretty. When you pour it over the warm cake, something magical happens. It soaks in. Creates these little pockets of sweetness throughout. Then as it cools, it sets into that coating that cracks slightly when you cut through.
Just. Like. The. Original.
I’ve brought this cake to probably a dozen gatherings by now. Family dinners. Church events. Work parties. Every single time—and I mean every time—someone asks me for the recipe.
They can’t believe something this good is this easy.
The other cool thing? This cake actually gets better as it sits. I know that sounds weird, but hear me out. After a day or two, the glaze really soaks into the cake. The flavors meld together. Everything becomes even more moist and delicious.
Whether you’re feeding 20 people at a potluck or just want something sweet to snack on all week, this honey bun cake has your back. Each square stays perfectly moist for days. And that first bite? It puts a smile on everyone’s face.
What You’ll Need
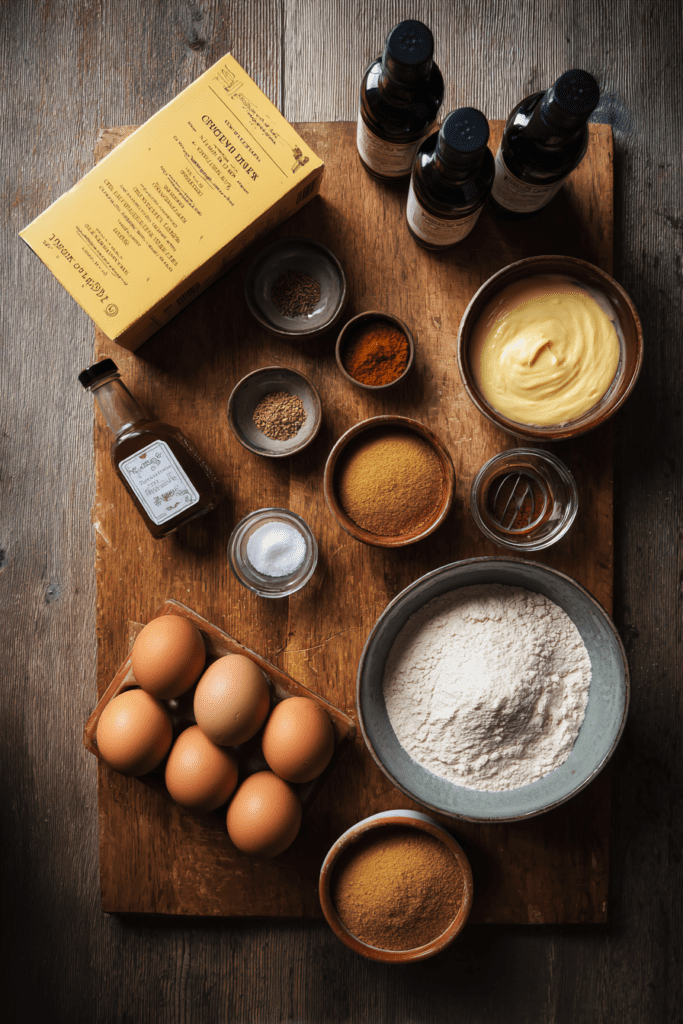
Okay, let’s talk ingredients.
The list looks kinda long when you first glance at it. But take a closer look—most of this stuff is probably sitting in your pantry right now.
| Ingredient | How Much | Quick Notes |
|---|---|---|
| Yellow cake mix | 1 box (15.25 oz) | Any brand works—I’ve tried them all |
| Sour cream | 1 cup | This is the moisture magic |
| Vegetable oil | 3/4 cup | Canola works too |
| Large eggs | 4 | Let them sit out for 30 min first |
| Vanilla extract | 2 tsp (for cake) | Cheap stuff works fine |
| Light brown sugar | 1 cup, packed tight | The gooey swirl maker |
| Ground cinnamon | 2 tsp | Fresh is better if you have it |
| Ground nutmeg | 1/4 tsp | Adds that warm bakery smell |
| Confectioners’ sugar | 1 1/2 cups | For the glaze |
| Milk | 4 tbsp | Whole milk is best |
| Vanilla extract | 1 tsp (for glaze) | Ties it all together |
Let’s Make This Thing
Step 1: Get Your Oven Ready
Crank your oven to 350°F.
While it’s heating up, grab your 9×13-inch baking pan. Spray it down really well with cooking spray. And I mean really well. Get the corners. Get the sides. You don’t want this cake sticking.
Pro tip? Don’t skip this step. A stuck cake is a sad cake.
Step 2: Mix Up the Batter
Grab a large mixing bowl.
Dump in:
- The entire box of cake mix
- Sour cream
- Vegetable oil
- All 4 eggs
- Vanilla extract
Now mix it up. I use my stand mixer, but a hand mixer or even a good whisk works fine. Just blend it until everything’s smooth.
Here’s where you might pause and think, “Wait, this seems really thick.”
Yep. It is.
It’s going to look almost like thick pancake batter. Not the pourable kind—the thick, dense kind. That’s exactly what you want. Don’t add more liquid. Don’t panic. Just beat it for about two minutes to make sure everything’s mixed in.
Pour half of this thick batter into your greased pan. Use a spatula to spread it around evenly. This is your base layer.
Step 3: Make That Cinnamon Magic
Grab a small bowl.
Mix together:
- Brown sugar
- Cinnamon
- Nutmeg
Stir it up until the spices are distributed throughout. The smell alone will make you hungry.
Now here’s the fun part.
Sprinkle this entire cinnamon mixture over the batter in your pan. Spread it out so it covers everything. Every bite needs that swirl.
Step 4: Layer It Up
Time for the rest of the batter.
Spoon it over the cinnamon layer. Be gentle here. You’re not trying to mix it in—you’re trying to cover it. Spread the batter carefully so it covers the cinnamon sugar without disturbing it too much.
Now grab a butter knife.
Make a few swirls through the top layer. Just the top—don’t go all the way down. Three or four gentle passes with your knife is all you need.
Don’t get carried away here. I know it’s tempting to swirl the heck out of it. But resist. You want those distinct ribbons of cinnamon running through the cake. Not a completely blended cinnamon cake.
Step 5: Bake It
Slide that pan into your oven.
Set a timer for 30 minutes.
The cake is done when you stick a toothpick in the center and it comes out with just a few moist crumbs. Not wet batter—just moist crumbs. The top should be golden and spring back a little when you press it lightly.
My oven usually takes about 33 minutes, but every oven is different. Start checking at 30.
Step 6: Whip Up the Glaze
While the cake bakes, make your glaze.
In a medium bowl, whisk together:
- Confectioners’ sugar
- Milk
- Vanilla
Keep whisking until it’s completely smooth. No lumps. The consistency should be pourable but thick enough that it coats the back of a spoon.
Step 7: Glaze Time
Here’s the crucial part.
When the cake comes out of the oven, let it cool for about 10 minutes. But that’s it. Just 10 minutes.
You want it warm when you add the glaze.
Pour that glaze all over the warm cake. Use your spatula to spread it evenly. The warmth of the cake helps the glaze sink in slightly. That’s what creates that authentic honey bun texture—part absorbed, part coating.
Now comes the hardest part.
Wait.
Let it sit for at least 20 minutes before you cut into it. This gives the glaze time to set properly. I know it smells amazing. I know you want to dive in immediately. But trust me on this one.
Tips That’ll Save Your Life
Get Everything to Room Temperature
Pull your eggs and milk out of the fridge 30 minutes before you start. Cold ingredients create lumpy batter. Room temperature ingredients mix together smoothly.
Seriously, Don’t Over-Swirl
I can’t stress this enough. Three gentle passes with your knife. That’s it. Any more and you’ll blend the layers too much. The beauty of this cake is those distinct ribbons of cinnamon.
Glaze While It’s Warm
This isn’t optional. The warm cake + glaze combo creates that signature honey bun texture. If you let the cake cool completely first, the glaze just sits on top. Not the same.
Let It Sit Before Serving
Give it time to set up. The cake tastes good warm, sure. But it tastes incredible after it’s had time to rest. The glaze sets. The flavors meld. Everything comes together.
Storage Tips
Keep it covered at room temperature for up to four days. Just throw some plastic wrap over the pan or transfer it to an airtight container.
And here’s a secret: it actually tastes better the next day. The glaze soaks in even more. The flavors develop. Day two is when this cake really shines.
Make It Your Own
This recipe is pretty forgiving. You can play around with it and make it your own thing.
Ingredient Swaps
Sour cream got you worried? Use Greek yogurt instead. It’ll give the cake a slightly tangier flavor, which is actually pretty great.
Want it richer? Swap the vegetable oil for melted butter. The flavor becomes more decadent.
Making this in the fall? Ditch the cinnamon and nutmeg. Use pumpkin pie spice instead. Instant autumn vibes.
Texture Changes
Feeling fancy? Skip the cake mix and make a yellow cake from scratch. It takes longer but gives you that homemade, artisanal texture.
Want some crunch? Toss some chopped pecans into the cinnamon layer. Or sprinkle them on top of the glaze before it sets.
Glaze Variations
Love maple? Stir a tablespoon of maple syrup into your glaze. It adds this incredible depth.
Can’t get enough cinnamon? Add a pinch to the glaze itself. Extra warmth, extra flavor.
Storing and Serving This Beauty
This cake stores like a dream.
At room temperature, it’ll stay fresh for 3-4 days. Just wrap it up in plastic wrap or stick it in an airtight container.
Need it to last longer?
Pop it in the fridge. It’ll keep for up to a week. The glaze might absorb into the cake a bit more, but honestly? That just makes it more delicious.
You can even freeze individual squares. Wrap each piece tightly in plastic wrap. Then throw them all in a freezer bag. They’ll keep for two months.
How I Like to Serve It
My favorite way? Warm it up.
Take a square. Microwave it for 15 seconds. The cake becomes soft and tender. The glaze gets slightly gooey again. It’s like eating it fresh out of the oven.
Pair it with:
- Hot black coffee (my go-to)
- Cold glass of milk (classic for a reason)
- Vanilla ice cream (if you’re feeling extra)
Questions You’re Probably Asking
Why is my batter so thick? Did I mess something up?
Nope. You’re good.
The sour cream makes it thick. Super thick. Almost concerningly thick if it’s your first time making it. But that’s intentional. That thickness is what gives you a moist, tender cake. Don’t add extra liquid trying to thin it out. Just mix it well and trust the process.
Can I use a different size pan?
Stick with 9×13 if you can.
Different pan sizes will mess with your baking time and texture. Too small and the cake will be too thick in the middle. Too big and it’ll be thin and dry. The 9×13 is really the sweet spot for this recipe.
How do I keep the cinnamon from sinking to the bottom?
The thick batter naturally holds it in place.
Just don’t over-mix or swirl too vigorously. If you go crazy with the swirling, you’ll blend everything together and lose those distinct layers. Be gentle when you spread the top layer of batter. Be gentle when you swirl.
My glaze came out too thick. Now what?
Easy fix.
Add milk. One teaspoon at a time. Whisk it in. Check the consistency. Keep adding milk until it flows easily but isn’t watery. Should take about 2-3 teaspoons to fix it.
Can I make this ahead of time?
Absolutely.
Bake the whole thing a day ahead. The flavors actually get better overnight. If you want the glaze to look fresh and glossy, add it the day you’re serving. But honestly? I usually glaze it ahead too. Saves time. Still tastes amazing.
Honey Bun Cake
Ingredients
Cake
- 1 box yellow cake mix 15.25 oz
- 1 cup sour cream
- 3/4 cup vegetable oil
- 4 large eggs room temperature
- 2 tsp vanilla extract
Cinnamon Swirl
- 1 cup light brown sugar packed
- 2 tsp ground cinnamon
- 1/4 tsp ground nutmeg
Glaze
- 1 1/2 cups confectioners’ sugar
- 4 tbsp milk whole milk preferred
- 1 tsp vanilla extract
Instructions
- Preheat oven to 350°F. Spray a 9×13-inch baking pan generously with cooking spray, including corners and sides.
- In a large mixing bowl, combine yellow cake mix, sour cream, vegetable oil, eggs, and vanilla extract. Mix with a stand mixer, hand mixer, or whisk for about 2 minutes until smooth. The batter will be very thick.
- Pour half of the batter into the prepared pan. Use a spatula to spread evenly across the bottom.
- In a small bowl, mix together brown sugar, cinnamon, and nutmeg until well combined.
- Sprinkle the entire cinnamon mixture evenly over the batter in the pan.
- Carefully spoon the remaining batter over the cinnamon layer. Gently spread to cover without disturbing the cinnamon sugar too much.
- Using a butter knife, make 3-4 gentle swirls through just the top layer. Don’t over-swirl or go all the way to the bottom.
- Bake for 30-35 minutes, or until a toothpick inserted in the center comes out with just a few moist crumbs. The top should be golden and spring back when lightly pressed.
- While the cake bakes, prepare the glaze by whisking together confectioners’ sugar, milk, and vanilla in a medium bowl until completely smooth with no lumps.
- Remove cake from oven and let cool for 10 minutes only. Pour glaze over the warm cake and spread evenly with a spatula.
- Let the cake sit for at least 20 minutes to allow the glaze to set before cutting into 24 squares and serving.