
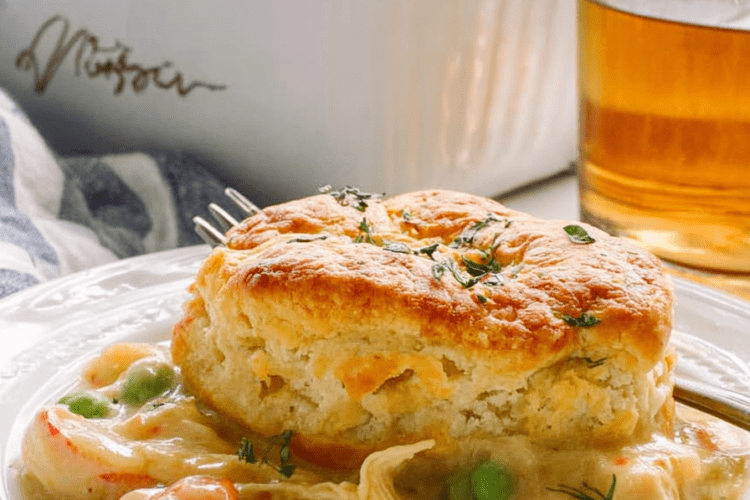
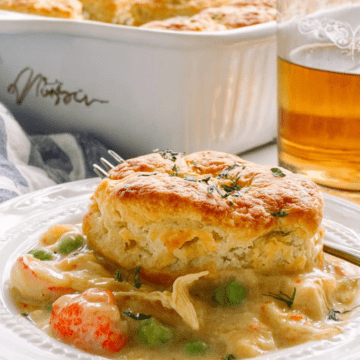
Tender chicken in creamy sauce. Those buttery biscuits we all love. Together in one dish.
This isn’t your grandma’s pot pie.
It’s better.
The Story Behind This Recipe
So here’s what happened.
I was standing in my kitchen one freezing Tuesday night. Couldn’t decide what to make. Part of me wanted pot pie. The other part? Those famous cheesy biscuits from that seafood place.
Then it hit me.
Why not both?
Look, traditional pot pie means rolling out dough. And some days? That feels like running a marathon. This version? We’re ditching the pastry altogether.
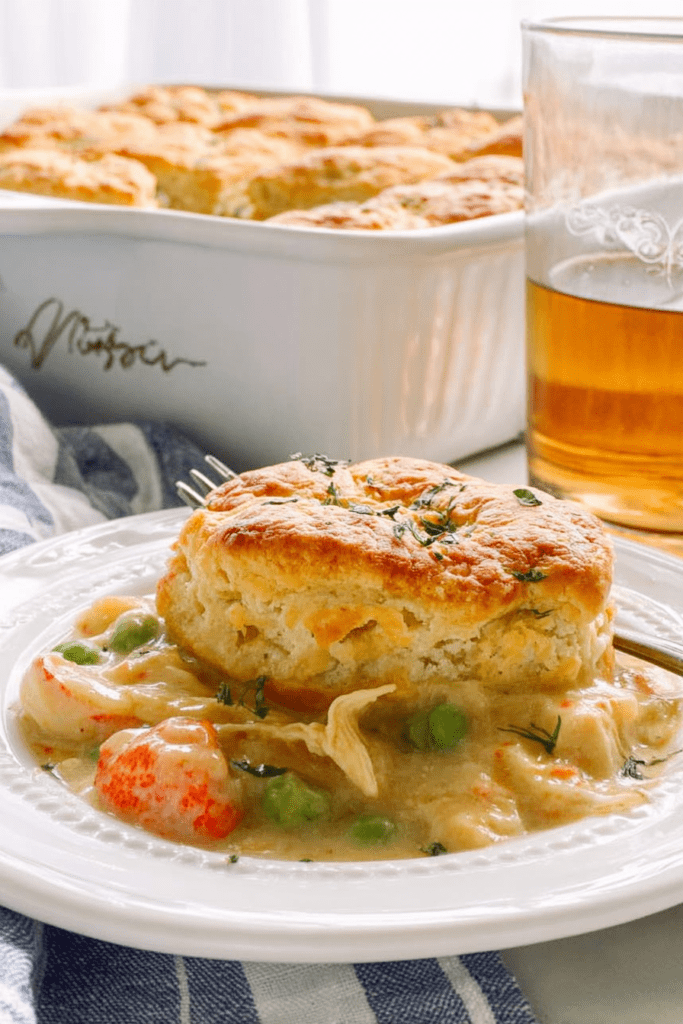
Instead, fluffy cheese-covered biscuits bake right on top of the filling.
The result is pure comfort food heaven.
Here’s Why My Family Begs for This
I’ve made pot pie probably a hundred times. Different crusts. Different fillings. Different everything.
But this one?
My kids ask for it by name.
The secret is simple. We layer everything. Each layer builds flavor without you spending three hours in the kitchen.
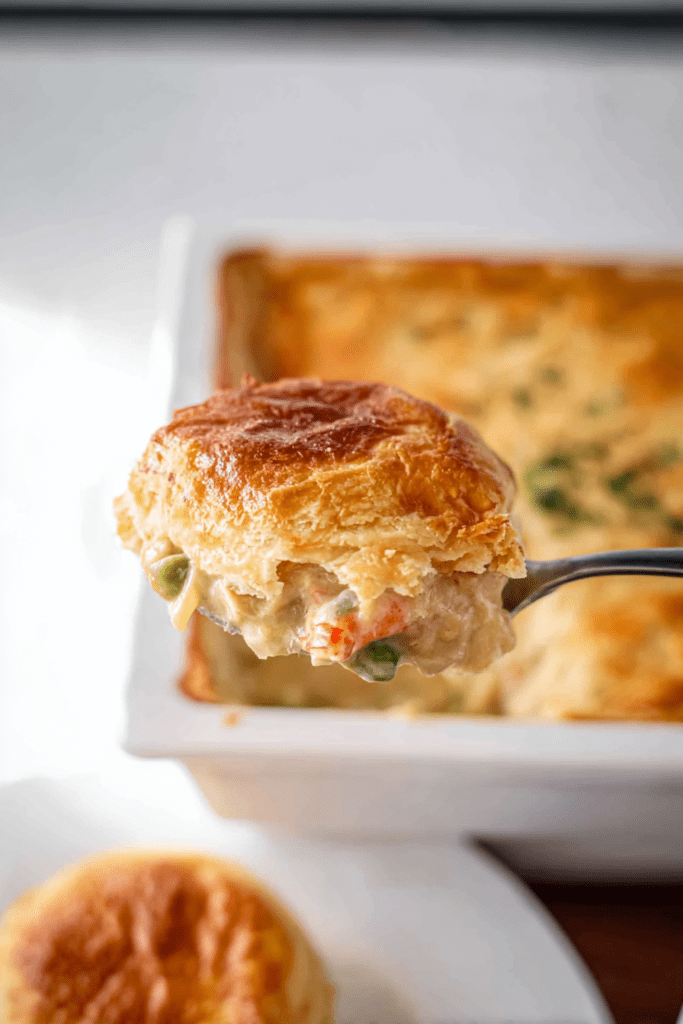
And that biscuit topping? It creates the most incredible contrast. Crispy and golden on top. Soft and saucy on the bottom. It’s basically two dishes in one.
Nobody’s complaining about that.
Breaking Down What Makes This Special
Let me explain the genius here.
The chicken: Already cooked. Grab a rotisserie from the store. Or use leftover roasted chicken. Either way, you skip cooking raw chicken. That’s a massive time-saver when you’re exhausted on a Wednesday night.
The veggies: Frozen peas and carrots. Straight from the bag. Zero chopping required.
I seriously love this shortcut. Because sometimes I barely have energy to turn on the oven, let alone chop vegetables.
The biscuits: Based on those famous ones from you-know-where. You can find the boxed mix at basically any grocery store now. It comes with the dry stuff and a seasoning packet. Garlic. Herbs. All the good flavors.
Three Things You’ll Absolutely Love
First? This recipe is super forgiving.
Your oven runs hot? Cool. Runs a bit cold? Also fine. Give or take 10 minutes won’t ruin anything. Just watch for that golden-brown color.
Second? Most of the work happens in bowls.
You’re whisking. You’re mixing. But you’re not standing over a hot stove constantly stirring something. Less babysitting. More freedom to do other things.
Third? Leftovers are incredible.
I’m not even joking. This tastes better the next day. All those flavors get to know each other overnight in the fridge.
The Nitty-Gritty Details
Prep Time: 15 minutes | Cook Time: 55 minutes | Total Time: 1 hour 10 minutes
Servings: 10 people | Difficulty: Easy (seriously)
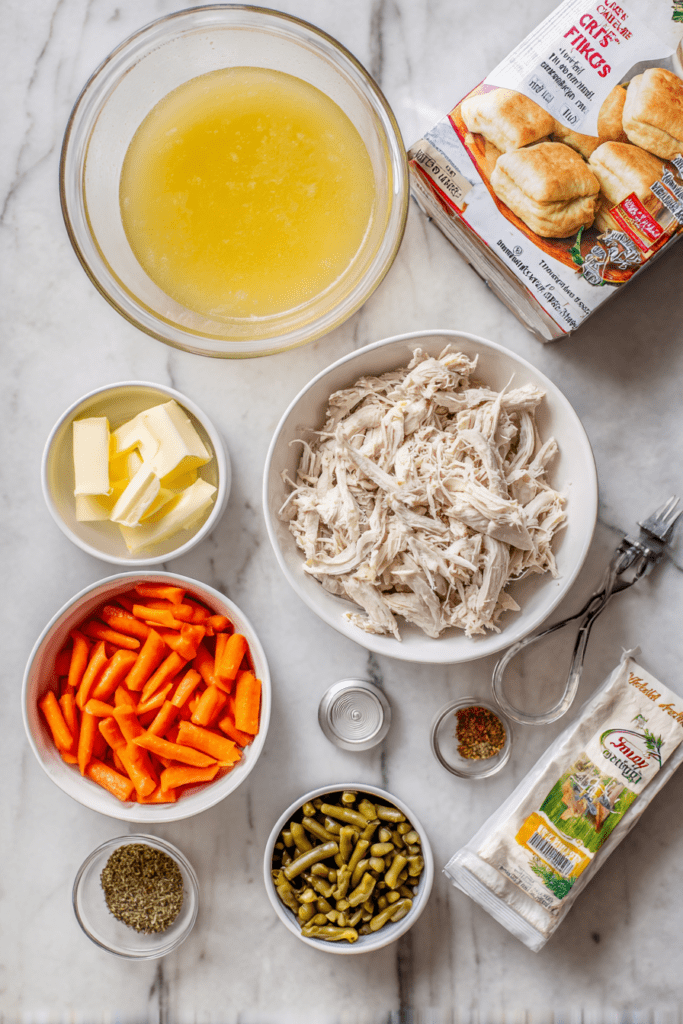
Everything You Need
| Ingredient | How Much | Important Notes |
|---|---|---|
| Butter | 1/2 cup (1 stick) | Split it up – you’ll use most now, save some for later |
| Cooked chicken | 4-5 cups | Shredded or cubed, doesn’t matter |
| Frozen peas and carrots | 10-12 oz | Don’t bother thawing them |
| Garlic powder | 3/4 tsp | Or use 2 cloves of fresh garlic if you’re fancy |
| Onion powder | 3/4 tsp | This adds that savory depth |
| Black pepper | 1/2 tsp | Freshly ground if you’ve got it |
| Chili powder | 1/2 tsp | Don’t worry, it’s mild – just adds warmth |
| Chicken broth | 1.5 cups | Go low-sodium if you can |
| Cream of chicken soup | 10.5 oz can | Just one regular can |
| Whole milk | 1 cup | 2% works too in a pinch |
| Cheddar Bay Biscuit Mix | 11 oz box | Make sure it has the seasoning packet |
| Cheddar cheese | 1/4 to 1/2 cup | Freshly shredded is best |
Let’s Actually Make This Thing
Alright, let me walk you through this exactly how I do it at home.
No fancy chef talk. Just real directions that make sense.
Step One: Get Your Oven Ready
Turn it to 350°F.
While it’s heating, melt your butter. I use the microwave. 30 seconds at a time. You want it fully liquid but not crazy hot.
Now grab your casserole dish. A 9×13 inch is perfect here.
Pour most of that melted butter into the bottom. Swirl it around to coat everything. But here’s the key – save about a quarter of it in your bowl.
You’ll need that later.
Trust me on this.
Step Two: Layer That Chicken
This part is ridiculously easy.
Take your shredded chicken. Spread it across the buttered dish. I use my fingers to break up big chunks as I go. You want pieces that are roughly the same size.
Don’t stress about making it perfect.
This is comfort food. Not a restaurant inspection. Just spread it around evenly.
Next? Open that bag of frozen veggies. Pour them right over the chicken. Spread them out with your hand. Or a spoon if you prefer.
They’ll be frozen and clumpy. That’s completely fine.
Step Three: The Spice Trick
Here’s something I learned the hard way.
Mix your spices in a small bowl first. Seriously. This stops you from ending up with one super-peppery corner and one bland corner.
Dump in your:
- Garlic powder
- Onion powder
- Black pepper
- Chili powder
Stir it with a fork. Then sprinkle this evenly over everything.
Now comes the important part.
Do NOT stir anything together.
I know you want to. Resist the urge.
The layers combine naturally while baking. You get these amazing pockets of concentrated flavor that way.
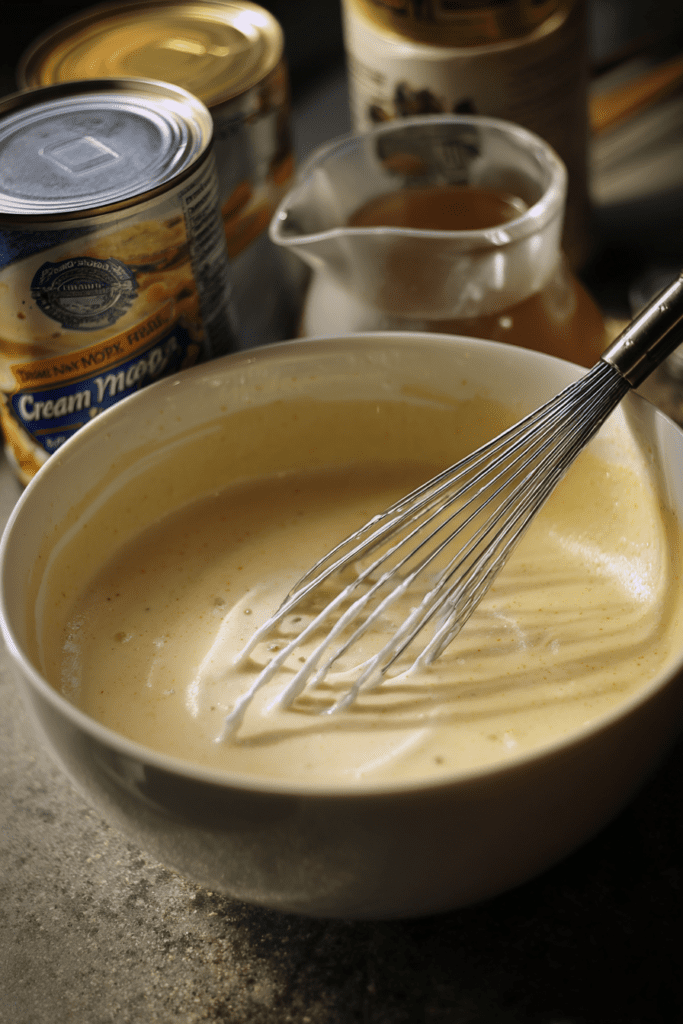
Step Four: Make the Creamy Sauce
Grab another bowl. One with a pour spout is ideal but not required.
Open your cream of chicken soup. Dump it in. Add the chicken broth.
Now whisk like your life depends on it.
That soup is thick. You need to really work at it to break up all the condensed bits. Keep going until it’s smooth and pourable.
Pour this beautiful mixture right over your chicken and veggies. Try to cover everything evenly. Let it seep into all those little spaces.
The liquid pools at the bottom. That’s what becomes your signature pot pie sauce.
Step Five: Mix Up Those Biscuits
Clean your bowl or grab a fresh one.
Time for the star of the show.
Pour in your milk first. Then dump in the entire box of biscuit mix. Every last bit.
Now that seasoning packet? Open it up. But only use half right now.
Save the other half. Put it back in the packet or transfer it to a small container.
Whisk everything until smooth.
The batter will be thicker than pancake batter. Thinner than cookie dough. You should be able to pour it, but it won’t be super runny.
Pour this over your assembled pot pie.
It won’t cover everything completely. And that’s okay. It spreads and puffs up as it bakes.
Step Six: Cheese Time
Remember that cheese sitting there?
Time to use it.
Sprinkle shredded cheddar over the whole surface. You can go light with a quarter cup. Or heavy with a half cup.
I usually split the difference.
The cheese melts and browns into this gorgeous golden crust. Plus it adds another layer of flavor that goes perfectly with those biscuits.
Step Seven: Into the Oven
Slide your casserole into that hot oven.
Set your timer for 55 minutes.
The exact time depends on your specific oven. And how deep your dish is. But 55 minutes is my sweet spot.
You’ll know it’s done when the top is gorgeous and golden brown. The edges should be bubbling hard. Sometimes I can actually hear it bubbling before I even open the oven.
Step Eight: The Final Touch
Timer goes off?
Carefully pull out your dish.
Remember that butter you saved? If it solidified, melt it again. Stir in the remaining half of that seasoning packet.
Grab a pastry brush. Paint this seasoned butter over the entire biscuit top.
This step is technically optional. But it adds SO much flavor. Those herbs and spices really pop.
Now here’s the hardest part.
Let it rest for 10 minutes.
I know. I KNOW. It smells incredible. But this resting time matters. The filling thickens up properly. And you won’t burn the roof of your mouth on molten filling.
Worth the wait.
Everything Else You Need to Know
Lessons I Learned the Hard Way
I’ve made this enough times to figure out what works. And what doesn’t.
Let me save you some trouble.
About the chicken:
Rotisserie from the store is your best friend. One whole chicken gives you the exact amount you need. Just pull off the meat. Toss the skin. Shred it with your hands or two forks.
Done.
Adjusting the spice:
That half teaspoon of chili powder? It adds warmth, not heat. If spice bothers you, use a quarter teaspoon instead. Love heat? Bump it to a full teaspoon.
Getting fluffy biscuits:
Use cold milk when mixing the batter. Cold liquid helps create better rise and fluffier texture.
The cheese situation:
Pre-shredded works. But freshly shredded melts way better. That pre-shredded stuff has anti-caking agents. Can make it grainy. If you’ve got five extra minutes? Shred your own.
Storing and Reheating This Beauty
This recipe makes a ton. Which means leftovers.
Here’s how to handle them right.
For the fridge:
Let it cool completely first. Room temperature. This stops condensation from making everything soggy. Then transfer portions to airtight containers.
Stays good for five days.
For the freezer:
This freezes like a dream. Up to three months. Wrap individual portions tight in plastic wrap. Then aluminum foil. Label it with the date.
Because six weeks from now? You won’t remember what that mystery container is.
Reheating it:
Best method? Oven at 350°F. Heat until warmed through. About 20-25 minutes from fridge temp.
You can microwave it. But the biscuit topping won’t be crispy. If you go that route, cover it loosely with a damp paper towel. Prevents it from drying out.
What to Serve Alongside
This pot pie is pretty filling on its own.
But I like adding lighter sides. A simple green salad with vinaigrette cuts through all that richness. Roasted green beans work great. So does steamed broccoli.
Want something heartier?
Try buttered corn. Or a simple coleslaw. That crunch and acidity contrast beautifully with the creamy filling.
Your Questions Answered
Can I use fresh vegetables instead of frozen?
Yep! You’ll need about 2 cups total. Diced carrots and peas combined.
But here’s the thing. You need to blanch them first. Boiling water for 2-3 minutes. Then drain well.
Why? Fresh vegetables have more water than frozen. This step prevents a watery filling.
What if I don’t have Cheddar Bay Biscuit mix?
No problem. Use regular biscuit mix. Like Bisquick.
Add to the batter:
- 1/4 tsp garlic powder
- 1/4 tsp dried parsley
- Pinch of cayenne
- 1/4 cup shredded cheddar
Won’t taste exactly the same. But it’s pretty darn close.
My pot pie turned out soupy. What went wrong?
Usually one of two things.
Too much liquid. Or not enough baking time.
Make sure you’re measuring that broth accurately. 1.5 cups. Not more. Also? Check your oven temperature. An oven thermometer costs like $10. Worth every penny.
If it seems thin after baking? Let it rest 15-20 minutes. It thickens as it cools.
Can I make this ahead?
Absolutely.
Assemble everything up to the biscuit topping. Cover and refrigerate for up to 24 hours.
When you’re ready to bake? Let it sit at room temperature for 30 minutes. Then add the biscuit mixture and bake as directed.
You might need an extra 10 minutes since it starts cold.
Any way to make individual portions?
Yes! This is actually perfect for meal prep.
Use oven-safe ramekins. Or small baking dishes. Divide everything proportionally.
Cut the baking time to about 35-40 minutes. Smaller portions cook faster.
My Final Two Cents
This chicken pot pie has become my go-to when I need a warm hug in food form.
It’s reliable. It’s delicious. It never fails to satisfy.
That combination of creamy filling and those incredible biscuits? Pure comfort food magic.
Don’t let the multiple steps intimidate you. Each one is simple. You’re basically just layering stuff in a pan.
The oven does the heavy lifting.
And the best part?
This recipe is flexible. Out of one ingredient? Swap it. Want more veggies? Throw them in. This is the kind of recipe that welcomes your creativity.
Give it a shot this week.
Your kitchen will smell amazing. Your family will ask when you’re making it again.
Mine already has it on regular rotation.
Cheddar Bay Biscuit Chicken Pot Pie
Ingredients
Base Ingredients
- 1/2 cup butter 1 stick, melted and divided
- 4-5 cups cooked chicken shredded or cubed (rotisserie works great)
- 10-12 oz frozen peas and carrots do not thaw
Seasonings
- 3/4 tsp garlic powder
- 3/4 tsp onion powder
- 1/2 tsp black pepper freshly ground if possible
- 1/2 tsp chili powder
Creamy Sauce
- 1.5 cups chicken broth low-sodium preferred
- 10.5 oz cream of chicken soup 1 regular can
Biscuit Topping
- 1 cup whole milk 2% works too
- 11 oz Cheddar Bay Biscuit Mix 1 box with seasoning packet
- 1/4-1/2 cup shredded cheddar cheese freshly shredded is best
Instructions
- Preheat oven to 350°F. Melt butter in microwave (30 seconds at a time until fully liquid). Pour most of the melted butter into a 9×13 inch casserole dish, swirling to coat the bottom. Reserve about 1/4 of the butter for later.
- Spread shredded chicken evenly across the buttered dish. Break up any large chunks. Pour frozen peas and carrots over the chicken and spread out evenly. Do not stir.
- In a small bowl, combine garlic powder, onion powder, black pepper, and chili powder. Stir with a fork, then sprinkle evenly over the chicken and vegetables. Do not stir the layers together.
- In a bowl, whisk together cream of chicken soup and chicken broth until smooth and pourable, breaking up all condensed bits. Pour evenly over the chicken and vegetables, letting it seep into the spaces.
- In a clean bowl, combine milk and biscuit mix. Add only half of the seasoning packet (save the other half). Whisk until smooth – batter should be thicker than pancake batter but pourable. Pour evenly over the pot pie (it won’t cover everything completely).
- Sprinkle shredded cheddar cheese over the entire surface (1/4 to 1/2 cup depending on preference).
- Bake for 55 minutes, or until the top is golden brown and the edges are bubbling. Timing may vary based on your oven – watch for golden color and bubbling edges.
- Remove from oven. If reserved butter has solidified, melt it again. Stir in the remaining half of the seasoning packet. Use a pastry brush to paint this seasoned butter over the biscuit top.
- Let rest for 10 minutes before serving. This allows the filling to thicken properly and prevents burning your mouth.