
Love sushi but scared of rolling it?
I’ve got you covered.
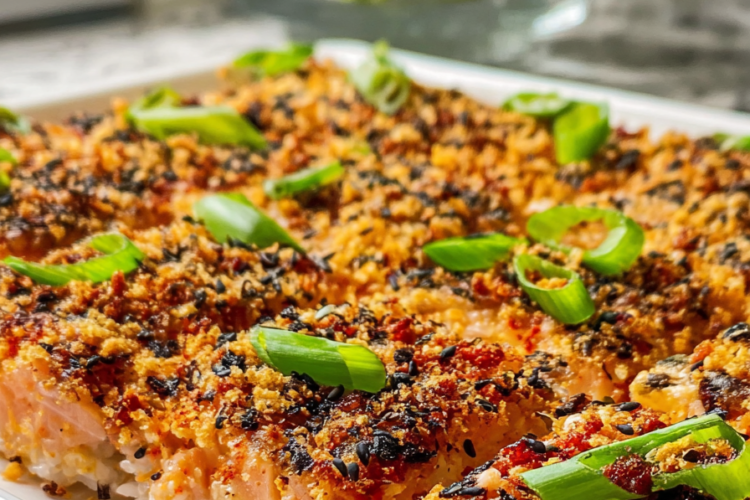
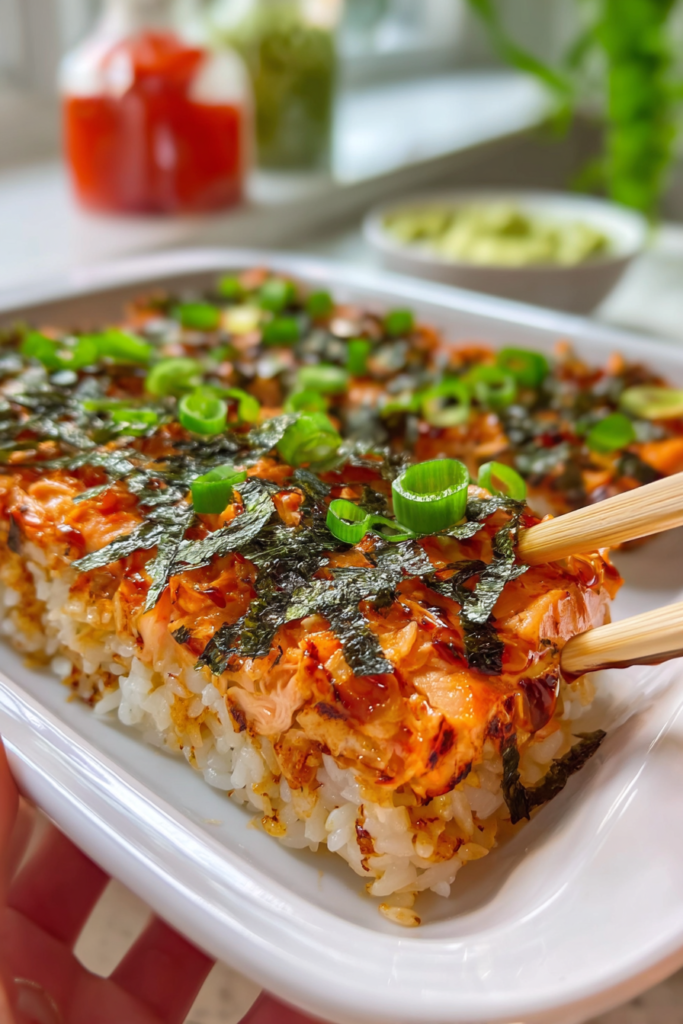
This salmon sushi bake takes everything you love about a classic salmon roll and turns it into an easy casserole you can share. We’re talking warm, creamy layers of seasoned rice topped with flaky salmon in this rich, savory sauce. It’s comfort food meets Japanese flavors.
And honestly? It’s addictive.
I first tried this at a potluck. Someone brought a version and I couldn’t stop eating it. The beauty here is simple—no fancy rolling techniques. Just layer everything and bake. Since that day, I’ve made it for family dinners, game nights, even meal prep.
Every. Single. Time.
Gone within minutes.
Recipe Timing:
Prep Time: 10 minutes | Cook Time: 30 minutes | Total Time: 40 minutes
Servings: 4-6 | Difficulty: Easy
Why Sushi Bake Works
Think of sushi bake as deconstructed sushi in casserole form.
Instead of rolling individual pieces, you layer everything in a baking dish. Heat it until bubbly and golden. The result? All those flavors you crave—seasoned rice, tender salmon, creamy sauce, savory toppings—but way easier to make.
Here’s what I love most.
It’s super flexible. Adjust the spice. Swap proteins. Add whatever toppings you want. Cooking for picky eaters? No problem. Cooking for adventurous eaters? Also no problem.
This version uses baked salmon mixed with cream cheese and Japanese mayo. Creates this luxuriously creamy texture that’s hard to describe. The furikake seasoning? That’s what gives you authentic sushi flavor—seaweed, sesame seeds, all those savory notes.
When it bakes together, something magical happens.
Let’s Talk Ingredients
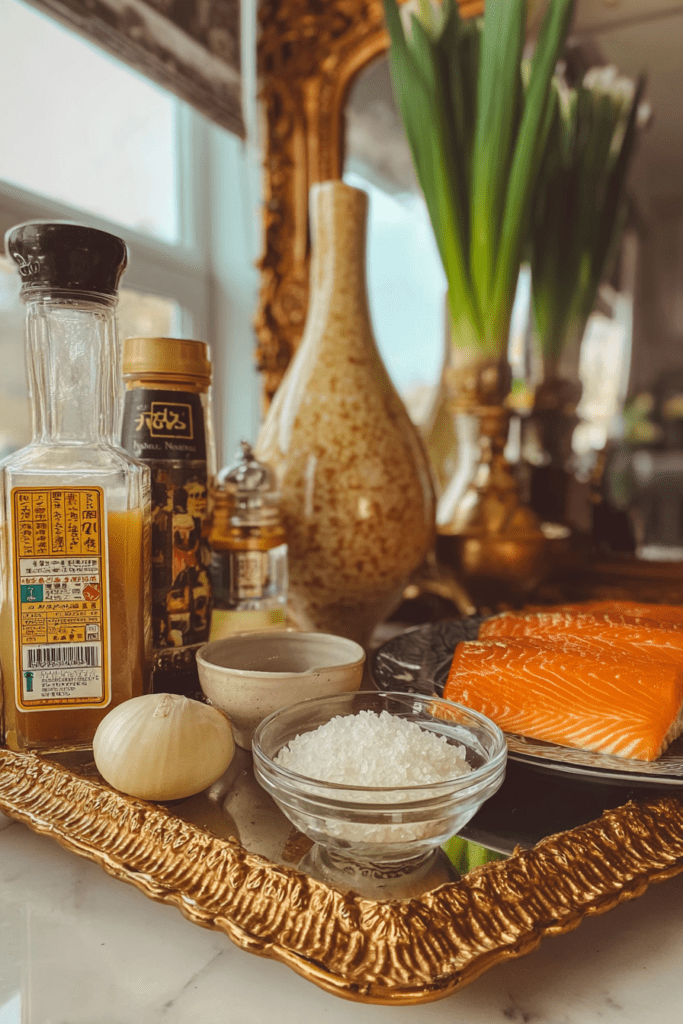
Image Prompt 2: Overhead shot of all ingredients neatly arranged—a bowl of cooked sushi rice, fresh salmon fillet, bottles of Japanese mayo and sriracha, cream cheese package, furikake container, green onions, and small bowls of rice vinegar and sugar
I’ve tested this recipe more times than I can count. Different combinations, different brands. This lineup? It’s the winner.
Let me break down why each ingredient matters.
The Foundation: Sushi Rice
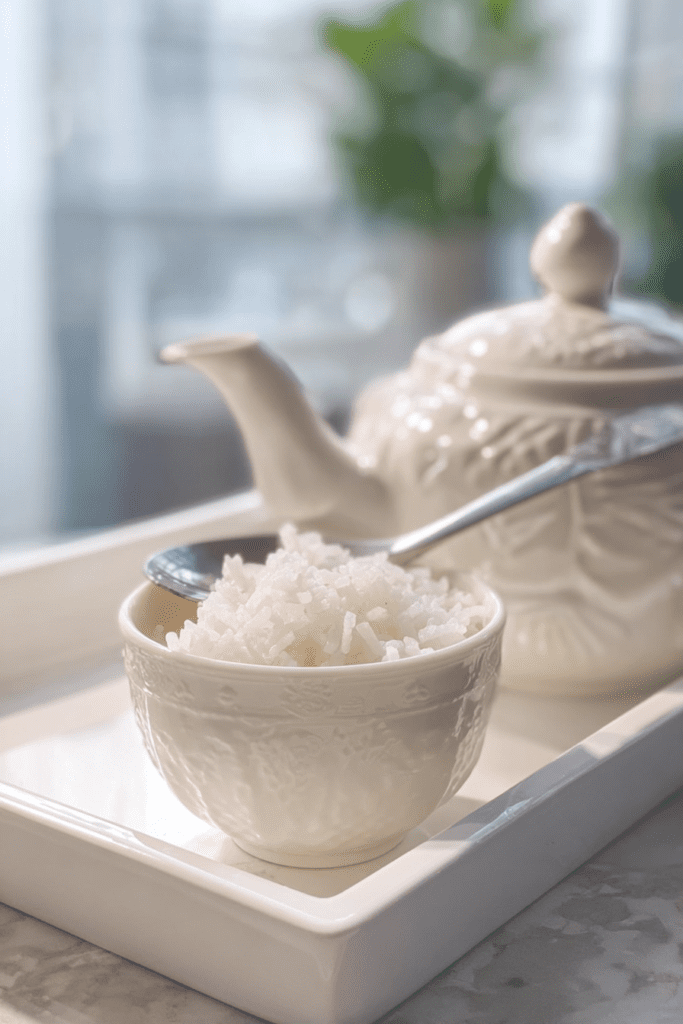
Short-grain sushi rice is your base.
It’s sticky. Holds everything together perfectly. I always cook mine ahead so it cools a bit before assembling. The seasoning—rice vinegar, sugar, salt—transforms boring rice into something that tastes authentically Japanese.
Not optional.
The Star: Salmon
One pound of salmon makes this a real meal.
I prefer fresh fillets, but any boneless, skinless salmon works. The trick? Bake it just until cooked through. Then flake it into tender pieces. This texture melds with the creamy sauce in the best way possible.
The Creamy Magic
Here’s where it gets good.
Japanese mayo—specifically Kewpie brand if you can find it—brings this rich, slightly sweet flavor that regular mayo can’t touch. Mix it with cream cheese and you get this incredible creamy base that coats the salmon perfectly.
The sriracha? Gentle heat that balances everything without burning your mouth off.
The Flavor Boosters
Furikake seasoning is Japanese rice topping. Usually has dried seaweed, sesame seeds, various seasonings. Adds that unmistakable sushi flavor throughout.
I layer it. Some with the rice. Some on top.
The eel sauce provides sweet and savory notes that tie everything together. Green onions add fresh, mild bite and beautiful color.
Your Shopping List
| Ingredient | Quantity | Notes |
|---|---|---|
| Cooked sushi rice (short-grain) | 4 cups | Should be slightly cooled |
| Salmon fillet | 1 lb | Boneless, skinless preferred |
| Cream cheese | ½ cup | Softened at room temperature |
| Japanese mayo | ½ cup + extra for drizzle | Kewpie brand recommended |
| Sriracha sauce | 2 tbsp + extra for drizzle | Adjust to heat preference |
| Eel sauce | ½ cup | For layering and serving |
| Furikake seasoning | ¼ cup | Japanese rice seasoning |
| Green onions | 2, sliced | For garnish |
| Rice vinegar | 2 tsp | For seasoning rice |
| Sugar | ¼ tsp | For seasoning rice |
| Salt | ¼ tsp | For seasoning rice |
For Serving:
- Roasted seaweed sheets (nori)
- Sliced cucumbers
- Sliced avocado
- Additional spicy mayo
- Extra eel sauce
Let’s Make This Thing
Time for the fun part.
Actually making this dish. I’ll walk you through each step. No confusing chef talk. Just simple directions.
Start with the Salmon
Preheat your oven to 425°F.
While it heats, season your salmon lightly. Salt, pepper, touch of garlic powder. Place it on a baking sheet. Pop it in the oven.
Needs about 20 minutes to cook through.
How do you know it’s ready? The flesh flakes easily with a fork. Don’t stress about it being perfectly intact—you’re breaking it up anyway.
Once done, pull it out. Immediately bump your oven temperature to 450°F.
You’ll need that higher heat later.
Create the Creamy Mix
This is where magic happens.
Take your cooked salmon. Flake it into bite-sized pieces. Any skin? Remove it now.
In a mixing bowl, combine:
- Flaked salmon
- Cream cheese
- Half cup Japanese mayo
- Sriracha
Mix until well combined.
Here’s the thing about mixing. How much you do depends on what texture you want. I like leaving some bigger chunks of salmon. Gives it variety. But if you want smoother? Mix more.
The mixture should be creamy. Spreadable. And smell amazing.
Season That Rice
Haven’t seasoned your rice yet?
Now’s the time.
Small bowl. Mix together rice vinegar, sugar, salt. Gently fold this into your cooked rice.
Key word: gently.
Don’t mash it. Don’t make it mushy. Just fold until evenly distributed.
This step takes plain rice and makes it special. The slight tang from vinegar. Sweetness from sugar. Savory note from salt. That’s classic sushi rice flavor right there.
Layer It Up
Grab a 9×13 inch casserole dish.
Time to build.
First layer: Spread seasoned rice evenly across the bottom. Press down gently. Creates a compact foundation.
Second layer: Sprinkle generous amount of furikake over the rice. Don’t be shy. This adds so much flavor.
Third layer: Spread your creamy salmon mixture over the furikake. Use a spatula. Get it to all the edges.
Now the artistic part.
Drizzle Japanese mayo, sriracha, and eel sauce over the top. I do a zigzag pattern. But honestly? Drizzle however you want. Just get that sauce distributed across the surface.
Finish with another sprinkle of furikake on top.
Bake Time
Slide your dish into that preheated 450°F oven.
Bake for 10 minutes. This lets all those flavors meld together.
Then switch to broil for 3 minutes. Watch it carefully during this step. You want golden and slightly crispy. Not burnt.
The broiling step?
Crucial.
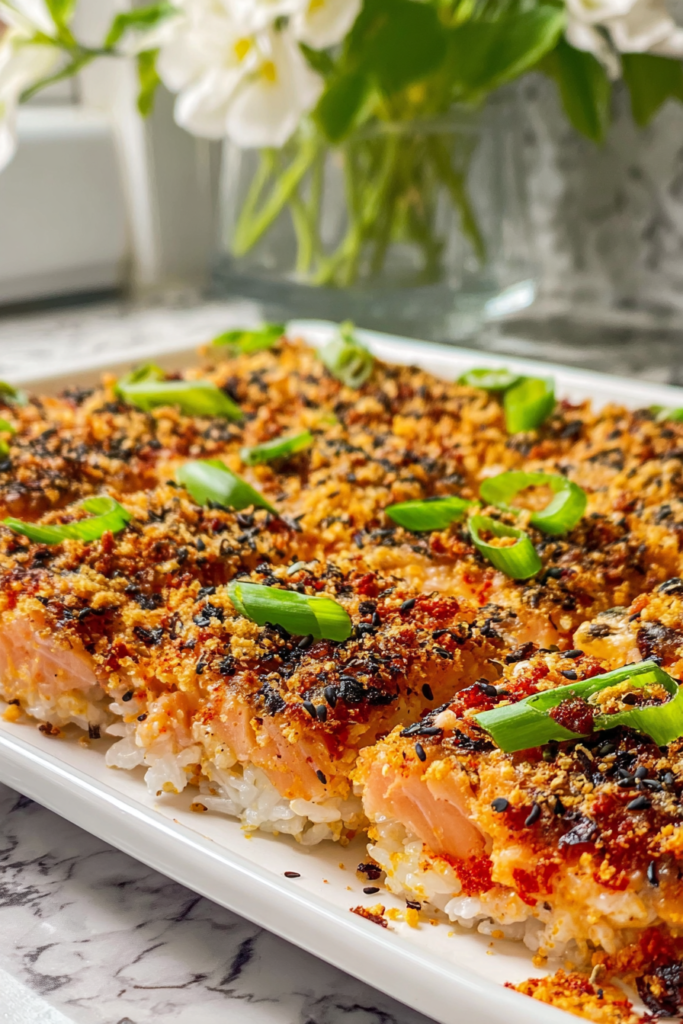
Creates this beautiful caramelization on top. Adds texture. Depth of flavor. You’ll see the sauce bubbling. Edges getting toasty.
That’s exactly what you want.
Final Touch
Pull it from the oven.
Immediately sprinkle sliced green onions over the top. The heat will soften them slightly while keeping their fresh flavor.
Let it cool for a few minutes. You want it warm, not tongue-burning hot.
Set out small dishes with accompaniments:
- Roasted seaweed sheets
- Sliced cucumbers
- Avocado
- Extra spicy mayo
- More eel sauce
This lets everyone customize their bites.
How to Actually Eat This
Best part about sushi bake?
Deciding how to eat it.
Here are my favorite methods. Try them all.
The Hand Roll Way
This is my personal favorite.
Take a sheet of roasted seaweed. Place a generous scoop of the baked mixture in center. Add sliced cucumber and avocado for freshness and crunch.
Fold it up like a taco.
Take a bite.
The combination? Warm, creamy filling. Crispy seaweed. Cool vegetables. Absolutely perfect.
The Casual Scoop
Want something more laid-back?
Just scoop the sushi bake into bowls. Use chopsticks. Use a fork. Heck, use cucumber slices as edible “chips” to scoop up each bite.
Works great for parties. Or when you’re eating solo on the couch watching Netflix.
The Full Experience
Tear off a piece of seaweed. Place it directly on top of a portion in your dish. Scoop everything up together with chopsticks.
Gives you rice, salmon, and seaweed in every bite.
Just like eating a traditional roll.
Don’t forget extra sauces. I always keep spicy mayo, eel sauce, and sriracha nearby for those who want more heat or sweetness.
Leftovers? Lucky You
If you somehow have leftovers (they don’t last long in my house), store them in an airtight container. Refrigerator. They’ll keep well for 3-4 days.
Reheating:
Oven at 350°F for about 10 minutes works best. Revives the texture better than microwave. Though microwave works if you’re in a rush.
Here’s something interesting.
Several people told me this freezes beautifully. I haven’t tried it myself. But they report it thaws and reheats perfectly for meal prep.
Making a large batch? Consider portioning some for the freezer.
Make It Your Own
Love this about the recipe.
It’s flexible.
No salmon? Try imitation crab, shrimp, even canned tuna.
Not a fan of spicy food? Skip the sriracha entirely. Still delicious.
Want more vegetables? Layer in thinly sliced cucumber or shredded carrots before baking.
For gatherings, I sometimes make multiple pans with different proteins:
- One salmon version
- One crab version
- Maybe a shrimp version
Gives everyone options.
You can also make individual portions using smaller baking dishes. Or even muffin tins for fun presentation.
The spice level? Completely adjustable. Start with less sriracha if you’re unsure. Offer extra on the side. This way everyone controls their own heat.
Your Questions Answered
Can I use regular mayonnaise instead of Japanese mayo?
You can.
But the flavor will be different. Japanese mayo has richer, sweeter taste. That’s because of the rice vinegar and egg yolks used in production. Regular mayo tends to be more tangy. Less creamy.
Only have regular mayo? Add a tiny splash of rice vinegar and pinch of sugar. Gets you closer to that Japanese mayo flavor.
Do I need fresh salmon, or can I use canned?
Fresh salmon works best for texture and flavor.
But canned salmon? Absolutely works if you’re looking for convenience. Look for boneless, skinless varieties. Saves you the hassle of picking through bones.
Bumble Bee brand gets good reviews.
Canned tuna is another excellent option. Korean brands if you can find them. Better flavor and texture.
What if I don’t have eel sauce?
Eel sauce adds wonderful sweet-savory element.
But you can substitute:
- Mixture of soy sauce and honey
- Teriyaki sauce
- Oyster sauce (different flavor but works)
Making homemade eel sauce? Surprisingly easy. Just soy sauce, mirin, and sugar simmered together until slightly thickened.
Should I serve this hot or cold?
I strongly prefer it warm.
Right out of the oven. The cream cheese and mayo create this gooey, comforting texture when heated. Absolutely irresistible.
However?
Perfectly fine served at room temperature. Even cold. If serving cold, make sure your rice is freshly made. Not refrigerator-hard.
Cold sushi bake works well with raw, sushi-grade fish if you want to go that route.
Can I make this ahead for a party?
You can prep components ahead.
But I recommend final assembly and baking right before serving. Best texture that way.
Here’s what I do:
Cook rice and salmon earlier in the day. Mix your salmon with cream cheese and mayo. Store everything separately in refrigerator.
When guests are about to arrive? Layer everything in your dish. Pop it in the oven.
Keeps the rice from getting too mushy. Ensures that beautiful golden top.
This salmon sushi bake has become one of my go-to recipes.
Want something special? But don’t want to spend hours in the kitchen? This is it.
Satisfies sushi cravings. But approachable enough for weeknight dinners.
The combination of textures gets me every time:
- Creamy salmon
- Slightly crispy rice
- Fresh vegetables
- That crackling seaweed wrapper
Creates an eating experience that’s both familiar and exciting.
I hope you give this recipe a try. Make it your own. Adjust the seasonings to match your preferences. Experiment with different proteins.
Most importantly?
Enjoy the process.
There’s something wonderfully satisfying about pulling that golden, bubbling casserole from the oven. Knowing you’re about to share something delicious with people you care about.
That’s what cooking is all about.
Now go make some sushi bake. And let me know how it turns out!
Salmon Sushi Bake
Ingredients
Rice Base
- 4 cups cooked sushi rice short-grain, slightly cooled
- 2 tsp rice vinegar for seasoning rice
- 1/4 tsp sugar for seasoning rice
- 1/4 tsp salt for seasoning rice
Salmon Mixture
- 1 lb salmon fillet boneless, skinless preferred
- 1/2 cup cream cheese softened at room temperature
- 1/2 cup Japanese mayo Kewpie brand recommended
- 2 tbsp sriracha sauce adjust to heat preference
Toppings & Layers
- 1/4 cup furikake seasoning Japanese rice seasoning
- 1/2 cup eel sauce for layering and serving
- 2 green onions sliced
- extra Japanese mayo for drizzling
- extra sriracha for drizzling
For Serving
- roasted seaweed sheets nori
- sliced cucumbers
- sliced avocado
Instructions
- Preheat your oven to 425°F. Season salmon lightly with salt, pepper, and a touch of garlic powder. Place on a baking sheet and bake for 20 minutes until the flesh flakes easily with a fork. Once done, increase oven temperature to 450°F.
- While salmon cools slightly, flake it into bite-sized pieces and remove any skin. In a mixing bowl, combine flaked salmon, cream cheese, 1/2 cup Japanese mayo, and sriracha. Mix until well combined but leave some bigger chunks of salmon for texture.
- In a small bowl, mix together rice vinegar, sugar, and salt. Gently fold this mixture into your cooked rice until evenly distributed. Don’t mash the rice.
- In a 9×13 inch casserole dish, spread the seasoned rice evenly across the bottom and press down gently to create a compact foundation.
- Sprinkle a generous amount of furikake over the rice layer.
- Spread the creamy salmon mixture over the furikake layer using a spatula, getting it to all the edges.
- Drizzle Japanese mayo, sriracha, and eel sauce over the top in a zigzag pattern. Finish with another sprinkle of furikake on top.
- Bake at 450°F for 10 minutes. Then switch to broil for 3 minutes, watching carefully. You want golden and slightly crispy, not burnt.
- Remove from oven and immediately sprinkle sliced green onions over the top. Let cool for a few minutes before serving.
- Serve warm with roasted seaweed sheets, sliced cucumbers, avocado, and extra sauces on the side. Scoop into nori sheets like a taco or eat directly from the dish.